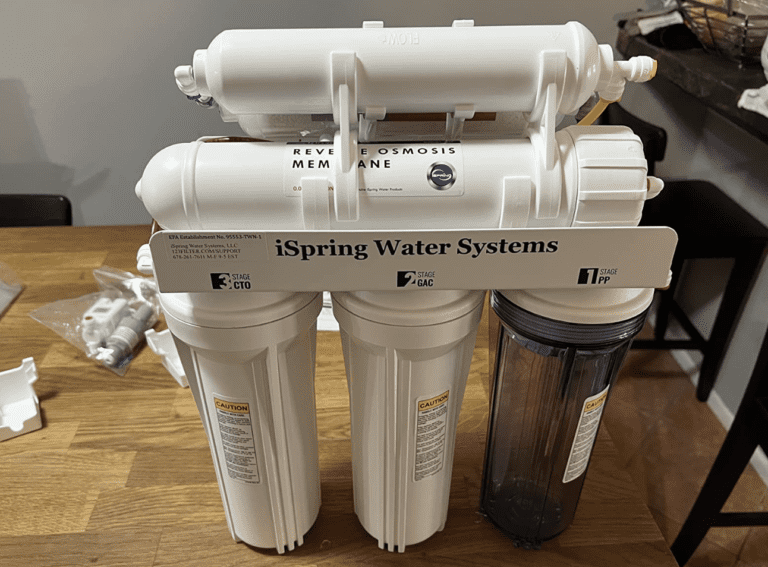
What Does a Reverse Osmosis System Do?
An RO system is a powerful filtration tool used to purify drinking water. The system uses an advanced process of removing impurities and contaminants from the water, such as bacteria, heavy metals, and other pollutants.
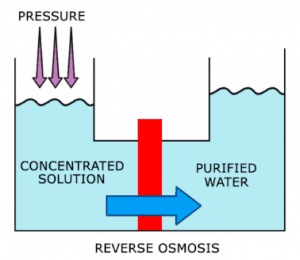
It works by forcing contaminated water through a membrane that filters out unwanted particles, leaving clean and safe drinking water on the other side. The wastewater that contains all the contaminants is sent down the drain.
The use of reverse osmosis systems has grown in popularity due to their ability to provide pure, fresh-tasting drinking water at home or in commercial settings. An RO system can also be used for treating seawater, making it suitable for agricultural use and other industrial applications.
By eliminating dissolved salts and other minerals from the water supply, this system helps ensure that only healthy safe drinking water is available for consumption. However, you should consider the pros and cons of RO system before purchasing one.
Why Is It Important To Sanitize Your Reverse Osmosis System?
RO systems are among the best methods for purifying water. It is important to sanitize your RO system in order to maintain its effectiveness. Sanitizing works by removing sediment and other particles from your RO system, which can lead to poor performance or even failure if left unattended.
Sanitizing helps keep the quality of your water supply high by reducing bacteria and other microorganisms that could cause health problems. By properly cleaning and maintaining your reverse osmosis system, you can ensure that it will continue to provide clean, healthy drinking water for many years to come.
Additionally, regular sanitization can help extend the life of your RO system so you don’t have to purchase a new one as often.
How To Sanitize a Reverse Osmosis System?
You may not realize it, but your RO system is actually a very delicate piece of equipment. Over time, contaminants can build up and create problems with the performance of your RO system. These contaminants include minerals, bacteria, and other microorganisms.
By sanitizing your best countertop Reverse Osmosis system regularly, you can ensure that it will continue to provide clean, healthy drinking water for many years to come.
Here is a quick and easy guide on how to sanitize your system.
What You Will Need:
- Cleaning Gloves
- Reverse Osmosis System Cleaning Brush
- Sanitizing solution / Warm soapy water
- One Gallon of Distilled White Vinegar
- 1/2 Cup of Baking Soda
Wash Your Hands & Wear Cleaning Gloves
Before you begin sanitizing your RO system, you should wash your hands thoroughly with soap and water to remove any contaminants. You should also wear gloves during the sanitizing process so that you do not get any chemicals on your hands.
Turn Off the Water Supply to the Reverse Osmosis System
Before you begin the sanitizing process, turn off the water supply to your reverse osmosis system. This is especially important if your reverse osmosis system is installed under a sink as it may leak and cause damage to your flooring or cabinets.
Disconnect the Refrigerator or Ice Maker Supply Line
Disconnect the refrigerator or ice maker supply line to the reverse osmosis system. This will allow you to flush out the system before you begin cleaning it.
Depressurize Your Water Tank
Decrease the water pressure in your system by turning the tank regulator valve counterclockwise. This will help ensure that any water that is left in the system does not leak out.
Remove Pre-Filters
Remove the pre-filters from the reverse osmosis pre-filter housing.
Remove the Rest of the Filters & the Reverse Osmosis Membrane
Remove the sediment and carbon filters and RO membrane from the reverse osmosis system.
Scrub the Inside of the Housing with Sanitizing Solution
Use a sanitizing solution to scrub the inside of the reverse osmosis system housing. You can use a sanitizing solution that is made for cleaning food preparation surfaces, or you can mix regular household bleach with warm water.
Flush the Entire System & Repeat
Once the RO unit is completely clean, you will want to flush the system one more time to get rid of any remaining sediment that has been loosened.
Use Distilled White Vinegar
The final step in cleaning your system is to sanitize it with vinegar. Use one gallon of distilled white vinegar for sanitizing the tank. This process will remove any bacteria and other contaminants left in the system from the cleaning process.
You can also use baking soda for this step. Run the vinegar or baking soda through the system for about 15 minutes. This will ensure that all of the cleaning products are out of the system, and it will clean any mineral deposits from the membrane in the process.
With the entire system, you should also clean the RO faucet.
Turn On the Cold Water Supply & Check for Any Leaks
The last step in the cleaning process is to turn on the cold water supply and check for any leaks from the faucet or tank valve. Use a flashlight and look for any splashing or dripping around faucets, connections, and valves. If you see any leaks, tighten connections as needed.
Finally, let your water run for a while. Check the traps to make sure they are not overflowing, and check the faucets to make sure that no leaks are present.
How To Clean Reverse Osmosis Membrane?
Cleaning the RO membrane is also essential in order to maintain its maximum efficiency and performance. Here is a step-by-step guide on how to properly clean your RO membrane.
- First and foremost, it is important that you take the time to inspect your reverse osmosis membrane for any signs of damage or corrosion before attempting any form of cleaning.
- After inspecting the membrane for any damages, it is recommended that you flush out the system with fresh water in order to clear away any sediment buildups which may have accumulated over time.
- Once flushed, use a soft brush and warm soapy water to gently scrub away any deposits that are stuck onto the surface of the membrane.
- Then, rinse the membrane with clean water, and allow it to air dry.
- Once dried, you can use a soft cloth that is free of lint and re-insert the membrane into your reverse osmosis system.
How To Clean Reverse Osmosis Storage Tank?
The RO storage tank fill contains a semipermeable membrane that helps to filter out any contaminants from entering your home’s water supply. To keep the membrane in top condition, it must be regularly cleaned and maintained by following these simple steps.
If you need to clean the storage tank separately, here is how to do it properly:
- First, disconnect all the pipes connected to the RO tank and remove them from their location for easy access.
- If possible, take it outdoors since this process could result in some dirt particles being released into the air.
- Then use a soft cloth or sponge with warm soapy water to gently scrub away any dirt or debris on the surface of the tank.
- After that is done, rinse off with clean running water until all traces of soap are gone.
FAQs
When should I Replace my Reverse Osmosis Membrane?
The RO membrane is the most crucial component of all reverse osmosis units. Generally, RO membranes should be replaced every 2-3 years. However, pay attention to signs that your RO membrane needs changing. This includes decreased water flow, poor water quality, high TDS levels, or leaking filters.
How do I know if my RO System needs to be Cleaned?
A change in the quality of your filtered water—bad tasting or smelling water is a telling sign that your reverse osmosis system needs cleaning.
How do I know if my RO filters need to be Replaced?
Changing RO filters is essential. While the RO membrane can be changed every 2- 3 years, the rest of the RO filters should be replaced more often—every 6 to 12 months. Also, take into consideration the quality of your water as source water with too many impurities would require you to use new filters.
What can I do to extend the life of my RO System?
Regular maintenance is one key to ensuring the efficiency of your RO system. Always follow the manufacturer’s manual and pay attention to the quality of your filtered water. If you notice that your water doesn’t taste right, or your filter is leaking then it’s time to check your filters and replace them.
Conclusion
In conclusion, regular cleaning of your reverse osmosis system is an important step to ensure the health and safety of your drinking water. Also, by replacing reverse osmosis filters and membranes, you can keep your reverse osmosis system running efficiently and effectively for years to come. Remember to follow the instructions in this article as well as any specific instructions that came with your RO system.