How to Change a Well Water Filter: Step-By-Step Instructions
If you have well water, it’s important to regularly change your well water filter to ensure clean and safe water. A well water filter removes impurities and sediment from the water before it enters your home. Here are some best whole house well water filters that you can check out.
Over time, the filter can become clogged with buildup, reducing its effectiveness. Here are step-by-step instructions on how to change a well water filter.
Gather the right accessories and tools
First, gather the necessary tools, such as a metal filter wrench or pliers, to loosen connections and remove old filters. A bucket may also come in handy for catching any excess water during the process.
Turn off the water supply
One of the most crucial steps in this process is turning off the water supply before you begin. Turning off your water supply ensures that you won’t accidentally flood your home or cause damage to your plumbing system.
To turn off your water supply, locate the main valve near your well or where it enters your home. Turn it clockwise until it stops completely.
Relieve the filter pressure
Locating the filter pressure relief valve and opening it will relieve any remaining pressure from your water system. This step is crucial to ensure that you don’t cause damage to your home’s plumbing system or blow apart your pressure tank in case there is any remaining pressure inside.
Unscrew filter housing
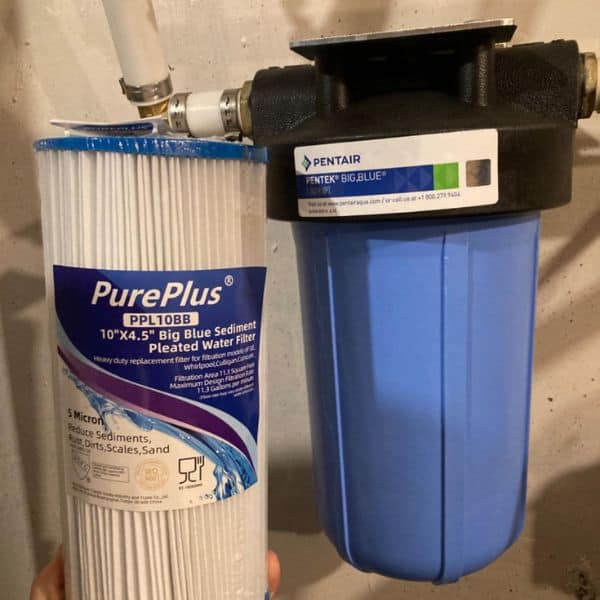
Next, locate the water filter housing – typically a white or blue plastic container near where your main water supply enters your home.
Use an appropriate tool, such as a wrench or pliers (depending on how tightly secured it is) to loosen and remove the filter housing cover. Be prepared for some water spillage once you remove this cover – place towels or buckets beneath it beforehand if necessary.
Remove the old filter
If you have changed the filter in the past, this should be a familiar step – simply pull it out of its housing.
Clean filter housing
Once the old filter is out, clean the housing thoroughly to remove any residue buildup that could affect your new filter installation.
Lubricate the housing’s O-ring
If the filter housing has an O-ring, use a small amount of food-grade silicon grease to lubricate it. This will help prevent leaks when you install the new filter.
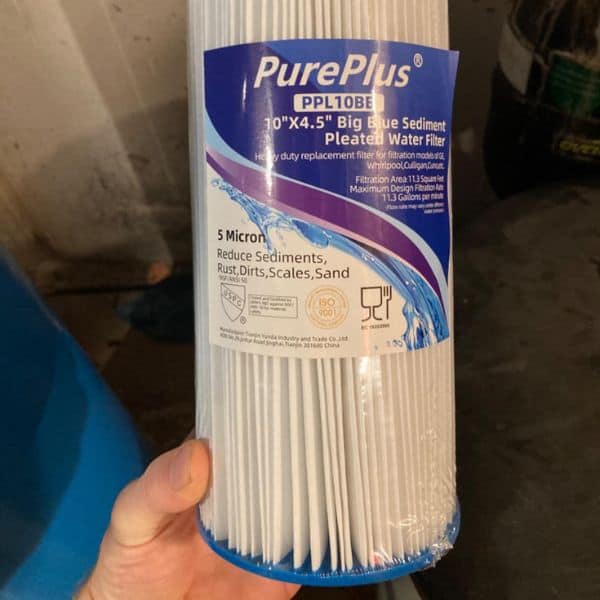
Place the new filter
Then carefully insert the new filter into the filter housing holding from the filter head. The seal will usually snap into place once fully seated in the housing, but some filters may require a gentle push to seat properly. So, to correct replacement filter, push it gently.
Attach the filter housing back to the system
After placing the new filter in its proper position, it’s time to reattach the filter housing back into your system.
Switch on the water supply
Once the housing is securely in place, it’s time to turn the water supply back on.
First, double-check that all connections are tight and secure before turning on the water supply. This will help avoid any potential leaks or other problems down the line. Next, slowly turn on the main valve for your well system and allow the water to flow through.
If you notice any leaks or unusual sounds coming from your system, immediately shut off the water supply and recheck all connections. It’s also important to monitor your water quality after changing your filter to ensure it works properly and effectively removes impurities from your well water.
Why Should You Replace Your Well Water Filter?
A well water filter system removes impurities and contaminants from your well water supply, which can cause health problems if left untreated. Over time, these filters can become clogged with debris and bacteria, reducing their effectiveness in purifying water.
Regularly replacing your well water filter is crucial to maintaining a clean and healthy drinking supply. The replacement frequency depends on various factors, such as the well water quality and the filter’s usage level.
How Often Should a Whole House Well Water Filter Be Changed?
It depends on several factors, such as the size of your household, water usage patterns, and the level of contamination in your well water.
If your well water is high in sediment or minerals like iron or manganese, your filter will likely require more frequent changes. On average, though, most filters are expected to last between 3-6 months before requiring replacement.
However, you may need to replace it more frequently if you have high contaminants in your well water or notice a drop in its filtration capacity.
Signs That Your Well Water Filter Needs Replacement
Filtering well water is essential so the well water filtration systems are designed to remove impurities from the groundwater. However, they may become clogged, damaged, or worn out over time. Some signs indicate it’s time to replace your well water filter.
Poor water quality
Poor water quality is one of the most crucial signs that your well water filter needs replacement. When contaminants build up in the filter or become clogged with sediment, it can no longer effectively remove impurities from your water. As a result, you may notice various issues with your well water’s taste, odor, and appearance. Additionally, if you notice discoloration or cloudiness in your well water, it may indicate it’s time to replace your filter.
Reduced water flow
Reduced water flow is another common sign that your well water filter needs to be replaced. Your well water filter helps to remove impurities from your drinking water, but over time it can become clogged with debris and minerals. As this happens, the water flow through the filter slows down, and you may notice a reduction in your overall water pressure.
If you have noticed reduced water flow in your home or business, it’s important to inspect your well water filter as soon as possible. The longer you wait to replace a clogged filter, the more damage it can cause to your plumbing system and the greater risk of harmful contaminants entering your drinking supply.
A drop in water pressure
A drop in water pressure is a common sign that your well water filter needs replacement. This could be due to clogged or dirty filters, preventing water from flowing through the system efficiently.
To prevent this from happening, it is important to regularly check your well water filter and replace it when necessary. You should replace the filter every three months or whenever you notice a significant drop in water pressure. This will help ensure your well water remains clean and safe for consumption.
In addition to replacing the filter regularly, there are other steps you can take to maintain good quality well water. These include testing your well for nitrates and bacteria, checking for leaks in your plumbing system, and being mindful of what goes down the drain.

Troubleshooting Well Water Filter Change
If you’re experiencing issues after changing your well water filter, there are troubleshooting steps you can take to ensure that it’s working properly.
What to do if the filter housing is stuck?
Sometimes the filter housing can become stuck and make it difficult to remove the old filter or install a new one. This can be frustrating, but there are some steps you can take to resolve this issue.
- Firstly, try using a strap or pipe wrench to loosen the filter housing. These tools provide more leverage than your hands and can help you better grip the housing.
- If that doesn’t work, apply heat to the housing using a hairdryer or heat gun. The heat will cause the plastic to expand slightly and loosen its grip on the filter housing.
- If these methods still don’t work, consider using penetrating oil like WD-40 around the edges of the filter housing where it meets with other components such as pipes or fittings. Let it sit for a few minutes and try loosening the housing again.
- If you still need help with problems, contact your local plumber.
What to do if the filter cartridge is stuck?
You may encounter difficulties removing the filter cartridge due to wear and tear or improper installation. If you find yourself in this situation, there are several methods you can try before giving up on removing the stuck cartridge.
- Use pliers, wrenches, or other tools to loosen and remove the cartridge.
- If these do not work, spray some lubricant around the base of the cartridge and let it sit for 30 minutes before attempting again.
- If you cannot remove the cartridge, contacting a professional plumber for assistance may be best.
Where Can You Find the Well Water Filter in Your System?
It is crucial to know where the filter is located in your system so that you can replace it when needed.
The location of the well water filter varies depending on the type of filtration system you have. The filter may be near the pressure tank or pump in some systems. In others, it may be placed in a separate filtration unit outside of your home.
To find out where your well water filter cartridge is, consult your owner’s manual or contact a professional plumber for assistance.
How Long Does a Well Water Filter Last?
The lifespan of a well water filter varies depending on several factors, such as the size of the filter, the quality of water being filtered, and the frequency of use. Generally speaking, most filters last around three months to a year before needing replacement. However, some high-quality models can last up to three years with proper maintenance.
Monitoring your filter’s performance is essential to determine when it needs replacing.
Conclusion
Changing a well water filter is an important preventive measure to ensure your home’s water supply remains safe. Inspecting and replacing the filter regularly will help reduce sediment, particles, and other contaminants in your water. Keep track of how often you change the filter for maximum efficiency. Additionally, it’s wise to research your particular filtration system needs to find the best type of filter for your needs.