
This is quite a common problem when the water supply you have is of hard water. Because of that, the spray-head of your kitchen faucet can often get filled with deposits of various kinds, which impacts its cleaning abilities.
But fret not, like any other issue, this one has quite a few solutions to it. This is exactly what this article is about.
Below, we have jotted down detailed instructions on how to clean a pull-down kitchen faucet spray head.
So, let’s begin.
What you need
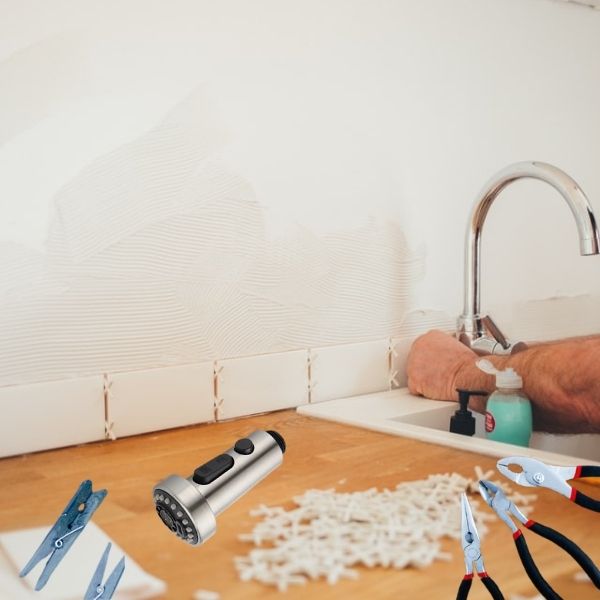
The items you will need for this process:
- Distilled white vinegar
- Pliers
- Sponge/Toothbrush
- Small clamp/Clothespin
- Flat-head screwdriver
- Flashlight
- A container/Bowl
- Wrench
How to Clean the Aerator?
The first important part is to cleanse your clogged aerator. This is a small inlet screen present in the spout of the kitchen faucets. They are also present in the spray heads, generally where the spray head connects with the hose.
Step 1: Remove the aerator
Start by pulling out the spray hose along with the spray head. Use a clamp/clothespin and block the hose, so it does not retract.
Use a screwdriver to unscrew the spray head.
Find the aerator. If it is not here, it might be in the hose connector.
Screw it out using a screwdriver.
However, it is possible that the aerator is positioned directly in the spray face.
In this scenario, you will require an adjustable wrench. Use it to unscrew the face and then remove the aerator.
Step 2: Rinse the aerator.
Rinse the aerator using water. Simultaneously, use a toothbrush and remove any mineral deposits you find in it.
Screw it back in the spray head as it was.
How to Clean the Spray Head?
Now the next factor is looking at your spray head.
If it has been in use for a while, simply cleaning the aerator will not be enough.
You need to ensure that the entire spray head is free from any calcium deposits.
For this purpose:
- Simply fill a small bowl with distilled vinegar (white).
- Soak the spray head in the vinegar.
- If you soak it overnight, the cleaning will be more thorough.
- Take it out, rinse it entirely with hot water, and place it back within the faucet hose.
This process will ensure that you are thoroughly cleaning your faucet heads.
You can also do this by wrapping a plastic bag filled with vinegar around the spray head.
Zip tie the plastic sandwich bag and use a rubber band to secure it.
Another concern
However, after this, there might be another problem. Despite cleaning both the spray head and the aerator thoroughly, you still might have a weak flow and pressure.
If that is the case, it means that something else is causing this to happen, and that is the problem we need to investigate and work on fixing.
How to clean the water hose fitting if the flow is still weak?
Pull the spray head from the faucet hose while the tap is still on and observe the flow of water.
Is it a full-speed, steady flow?
If not, the problem might be deeper down in the pipes.
The fitting at the other end of the water hose might be causing this problem. It is a small plastic part that can often fill up with deposits.
Use vinegar and the following steps to cleanse this part as well:
Steps to clean the faucet hose fitting:
- Look below the kitchen sink and locate the point where the faucet hose appears from the spout tube.
- Follow the hose from the sink to the point where it connects the faucet body.
- Pull it apart and then use pliers to remove the fitting from the spray hose.
- Soak this part in distilled vinegar for a few hours.
- After it’s done, wash it with water and place it back in its place.
This will remove any problems you had with the flow of the water.

Don’t When Cleaning Stainless Steel Faucets
Don’t use abrasives
Stainless steel might be a rigid material, but in no circumstances should you be using any abrasive cleaners such as bleach, ammonia, or scouring powders to clean your clogged faucet heads.
Also, be wary of using water directly from your faucet head because it might be hard water. This can leave scratches on your stainless steel faucet and create hard water deposits.
Don’t let grime sit
Do not let gunk sit on your faucet head waiting for tomorrow morning.
To save yourself from hard scrubbing later, wipe any dirt as soon as possible. This will also save you from a deep clean later on.
Do not forget to read the instruction manual.
The manual that comes with your product might list instructions on keeping your faucet, faucet head, sprayer head, spray nozzle, and other parts clean.
Sometimes they are very detailed, sometimes not so much. Do ensure to check it out once.
Wrap-up
You should ensure that you are cleaning your pull-down sink faucets regularly to avoid any long-term problems. And remember, vinegar is your best friend here.
If you need to replace your faucet, make sure to look for a reliable supplier.
Happy cleaning!